

Creating a Report Based on Existing One
Select existing report template. If the opened repository is based on a physical folder, choose Report | Save As... menu to save the report as a new file in this folder. If the opened repository is based on a database, choose Report | Duplicate... menu to save the report in a new database record. Then change the Data Source properties (if needed) and rebuild report objects in Report Builder.
You can use Reportizer report examples as a starting point to create your first reports.
Creating New Report
Click Create Report Template button. The new window will appear where you in step-by-step mode can create your report.
Step 1. Specify report data source

At the first step, you specify the data source for your report:
Database. Specify a database.
Data set (SQL Query or Table). If your dataset is a table, enter the name of the table from the selected database. If your dataset is a SQL query, type its text in SQL Editor (at the bottom) or load it from file using the corresponding button or simply by dragging and dropping a file with SQL text into the SQL Editor. If your SQL query contains parameters, clicking Next button will cause the new window appearing, where you will be able to specify parameter data types, default values etc.; click Cancel to skip this (in this case you will be asked to specify parameter data types and values on report preview).
After finishing, click Next to continue.
Note
Moving to next step will cause opening the specified data set. If you use a very complex query, which may take long time to open, you may prefer the first way to create your report (based on existing report), where you will be able to specify SQL text without needing to execute the query.
Step 2. Specify report data fields
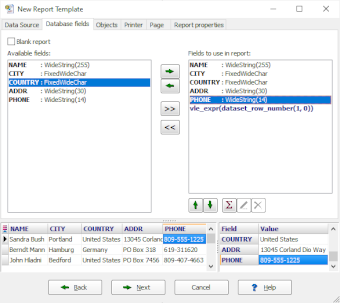
At the second step, you specify the fields of your data set, which you wish to see in the report. For these fields, Reportizer will automatically create the corresponding report objects.
In the left part, you will see all available fields. Use appropriate buttons to select needed fields from this list so that they appear in the list to the right.
Additionally, you can add calculated fields here.
If you does not want to automatically create report objects, turn on the Blank report option. In this case, you will create the needed object by yourself when editing the created report in Report Designer.
After finishing, click Next to continue.
Notes
- For each physical field you added, Reportizer will create at least two objects: a Label (placed on Column header band) and a Database Text (placed on Data band) with default size. If the field is numeric, the Expression object may also be added in Totals band. You will be able to resize those objects (as well as delete or create new ones) later, when editing created report template.
- For each calculated field, Reportizer will create two objects: a Label (placed on Column header band) and an Expression (placed on Data band) with default size. You will be able to resize those objects (as well as delete or create new ones) later, when editing the report.
- Fields, which was not added, will still be available to use in report unless you did not change your data set.
Step 3. Specify the visual style and naming schema for automatically created objects
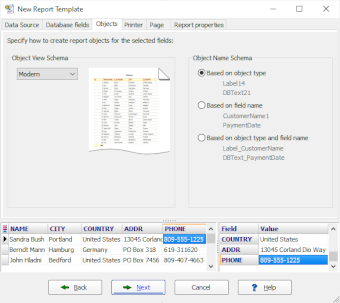
At the third step, you specify the the visual style and naming schema for the objects which are created automatically.
There are several predefined visual styles. Choose the one you like more.
Each report object must have a unique name within the report. The names will be chosen by the application, but you can specify the naming schema for them. Please note that the name must contain only Latin characters, numerals, and underscore symbol, and begin with a letter; if your naming schema cannot provide such a name, default schema (based on the object type) will be applied.
Notes
- Reportizer will use the specified parameters only when creating the report.
- You can rename automatically created objects later (if needed) when editing the report.
Step 4. Specify printer parameters
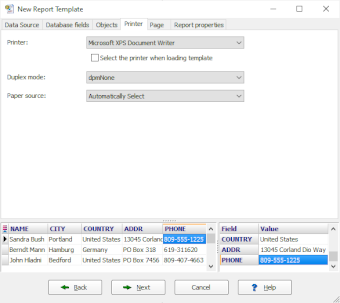
At the fourth step, you specify the parameters of the printer, which are specific to your report.
Step 5. Specify page parameters
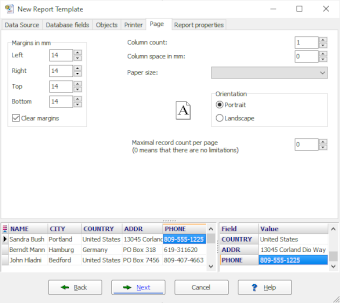
At the fifth step, you specify the parameters of the page, which are specific to your report.
Step 6. Specify report properties

At the last step, you specify additional (all are optional) report properties such as report description, grouping records etc.
When everything is done, click Finish.
Then the application will save the new report to the current repository (if any) or to the folder of your choice. If the repository represents a database, the application will save the new report in the new record of the corresponding database table, so you will be asked to enter key field values to uniquely identify this record and other mandatory fields (if any). If the repository represents a folder from your file system or if there is no open repository yet, then you will be able to save the report as a new file.
After saving the report, the corresponding repository refreshes its report list and the last created report will be automatically opened for editing.
See also